Part 1: Introduction
Want to learn to make concept art but don’t know where to start? This series will help you get your feet wet. Because the skillset is rooted in traditional drawing and painting, don’t expect to be the next superstar concept artist overnight. Instead, think of this 101 course as an opportunity to get to know the tools. Over these five short lessons I’ll show you what you need to get started on the path of digital painting.
You’ve probably seen your fair share of concept art on the internet. Whether you’re looking at a sprawling Martian landscape or a craggy cave troll it’s likely that a concept artist is responsible. Though this creation process is involved and fast paced it can be distilled into two basic parts: design and execution. The first portion, design, is the deeply imaginative act. How many horns should the elder dragon have? What shape is the alien life form? Concept artists work long and hard to create originality. Creativity of this sort is hard to teach. The second portion, execution, is what this series focuses on.
Download the Software
Before you get started, you’re going to need Adobe Photoshop – and the official website has a 30 day free trial. Once you’re familiar with the basic principles, you may decide that Photoshop Elements ($99) or the GIMP ($0) is a better fit for your budget, but for this series I’ll be using Adobe Photoshop CS5.
Lose the Mouse
Traditional painters use brushes and pencils, and digital artist use USB tablets. Other than the pen-like form factor, these digitizers differ from computer mice in one key aspect: pressure sensitivity. While a mouse is only capable of a binary clicking action, the USB tablet outputs a gradation of intensity. Press hard with one of these pens and you get a dark line; ease up to lighten your mark.
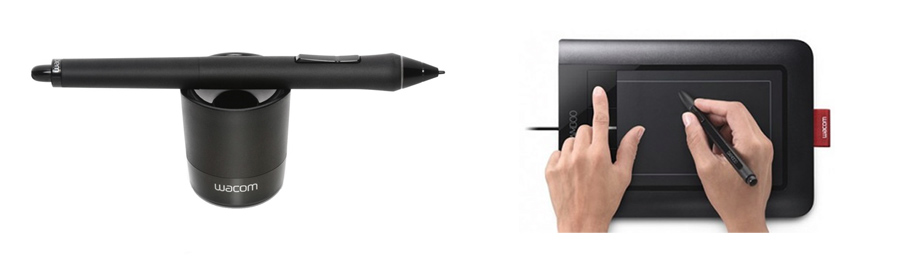
The most common USB tablet brand is Wacom, and they offer an entry level “Bamboo” model which provides great value for the sub-$100 price-point. Though I occasionally hear stories of a digital painter opting to use a mouse, it is quite rare. To follow along with this series you’ll be well served to have a USB tablet of some sort.
Welcome to Photoshop

Used for a variety of graphic tasks, Photoshop is dense software filled with menus and options galore. Generally speaking, however, digital painting requires only a small fraction of these offerings. Knowing which parts to display and which parts to hide will make your challenge much easier! Let’s begin by creating a new document. When prompted with the new document dialog, enter the following settings to match those shown here.
Before we go any further, it’s time to define a few things. In Photoshop terms, a palette is a free-floating window which contains information. When you open the window menu, you can reveal or hide the palettes. A check mark means that it’s now visible. The vertical palette on the left side of the screen is called the “tool palette”. I’ll select the brush tool by clicking on the brush icon.
Tool Properties
Whenever you have a tool selected, the information shown in the top bar will change. This is called the Tool Properties. In this case, there are three different properties which modify the brush tool. If your Tool Properties bar looks different than mine, you might have a different tool active.

Color Picker
Near the bottom of the tool palette, you’ll see two squares of color – potentially black and white. These are called the foreground and background color. The color on your brush is known as the ‘foreground color’. If you want to change this color, click on the foreground square and it opens up the color picker.
Getting Set Up
Now that you know some of the basics of the interface, it’s time to get set up for painting. The necessary palettes to have displayed are the following: Navigator, Layers, Tools
The Navigator will serve as your roadmap. It displays a thumbnail sized version of your canvas, and allows you to zoom and pan. The small and large mountain buttons control the zoom, and the red rectangle can be dragged around to pan your canvas when zoomed in. You can position these palettes wherever you like, but I like to keep them on the left side of my window. This layout works well for me because I am right handed.
Keyboard Shortcuts for Getting Around
Sometimes operating software feels like digging through a dense instruction manual. You’re attempting to do a creative act, but getting bogged down by an endless sea of menus and pulldowns. What better way to speed up your painting than with keyboard shortcuts? These shortcuts* aren’t very flashy, but they’re worth learning before you progress any further.
*I’m a PC user, so if you use a Mac replace each instance of ‘Ctrl’ with ‘command’.
- Zoom: To quickly zoom in and out, press Ctrl+ + and Ctrl+ -
- Pan: If you’re zoomed in to a portion of your canvas, hold down Spacebar to temporarily switch to the Hand tool, and left click drag to move your canvas around.
- Hide the Interface: Need more space? Hide the UI with the Tab button. To reveal it, hit the Tab button a second time.
Knowing these shortcuts is especially useful if you like the minimalism of a hidden UI. All keyboard shortcuts work regardless if their button-counterpart is visible, so you can zoom and pan to your heart’s content with the interface hidden. Painting full-screen with the user interface hidden has a certain elegance – and might blow some minds at a the coffee shop.
Review
If this is your first experience with Photoshop you might be feeling a bit overwhelmed. Don’t worry, everyone feels this way when they dive into new software. To review the concepts covered in this lesson I’ve created a simple drill.
Homework: Basic Navigation drill
- 1) Draw a red triangle in the upper left hand portion of your canvas.
- 2) Change your color to blue, and draw a rectangle in the lower right quadrant.
- 3) Change your color to green and draw a squiggle connecting the two shapes.
- 4) Hide the interface with the TAB key, and zoom into your canvas with Ctrl+ + so only the red triangle is visible.
- 5) Pan your visible canvas while holding the SPACBAR to follow the squiggle path toward the blue rectangle.
- 6) Once the blue rectangle is visible, zoom out to show your entire canvas with Ctrl+ -
- 7) Repeat this sequence until you feel comfortable with basic navigation!
